Bread Machine Sourdough Bread: Formulas, Cycles & Hydration Math
For generations of home bakers, the allure of the automated bread machine has clashed with the artisanal romance of sourdough. Traditional sourdough wisdom insists on cast iron Dutch ovens, delicate coil folds, and 80% hydration wet doughs. Yet, millions of busy home cooks own countertop bread makers (Zojirushi, Cuisinart, Panasonic, Oster) and yearn for the crisp crust, tangy chew, and gut-healthy prebiotic benefits of pure wild fermentation without spending 24 hours hovering over a proofing counter.
Baking true sourdough in a bread machine is not a compromise—it is an exercise in applied culinary physics. By understanding friction factor temperature formulas, scaling back hydration to match vertical non-stick pan dynamics, and synchronizing natural wild yeast rise times with your machine's cycle logic, you can produce stunning, tall, airy sourdough loaves completely unattended.
The Science of Mechanical Kneading vs. Levain Hydration
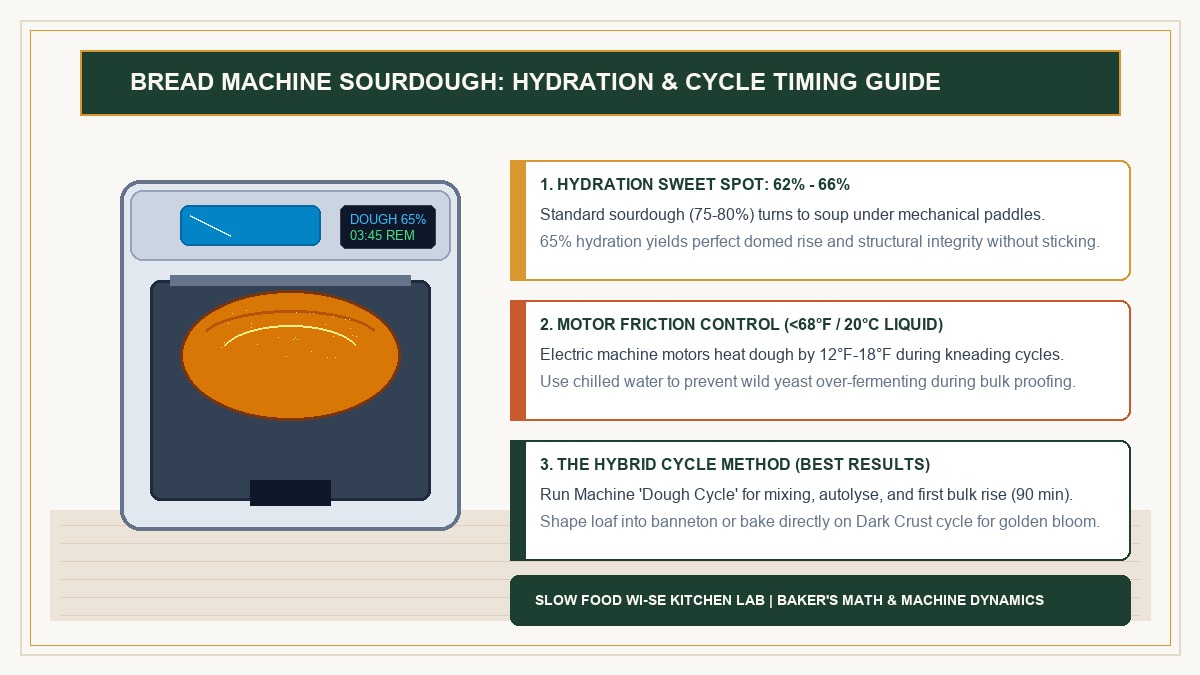
When transitioning from hand-crafted boules to an automated bread maker, the number one point of failure is excessive hydration. In a round Dutch oven, dough spreads horizontally until the hot iron walls support it into vertical oven spring. In a bread machine bucket, dough is confined to a tight, tall rectangular column:
| Hydration Level | Machine Behavior | Crumb Structure | Recommended Action |
|---|---|---|---|
| 75% - 85% (Standard Sourdough) | Smears up vertical walls, sticks to paddle, fails to form cohesive ball | Dense bottom layer, collapsed wet top crater | Avoid: Too wet for machine paddle mechanics |
| 68% - 72% (Intermediate) | Forms loose ball, may require paddle scraping during knead | Good open crumb, slight flat top | Viable: Requires ultra-high protein flour (13.5%+) |
| 62% - 66% (Machine Sweet Spot) | Cleans sides of pan completely; forms taut, smooth, silky gluten dome | Tall rounded dome, uniform honeycomb crumb, easy slicing | Optimal: The golden standard for automated bread makers |
Motor Friction Heat: A bread machine motor spins a stainless steel paddle through dense flour mass for 15 to 25 minutes. This mechanical shear produces between 12°F and 18°F (7°C to 10°C) of friction heat. If you use lukewarm water, your internal dough temperature will spike past 92°F (33°C), triggering frantic bacterial acid production that enzymatically breaks down gluten before wild yeasts can expand. Always compensate by calculating with our interactive sourdough calculator and using chilled water (60°F–65°F / 15°C–18°C).
The Master Bread Maker Sourdough Formulas (Bakers Percentages)
These two master formulas are calibrated for 1.5-pound (medium) and 2.0-pound (large) bread machine buckets. Both utilize high-protein unbleached bread flour (King Arthur or Bob's Red Mill, 12.7% protein) and 100% hydration mature starter fed within 4 to 8 hours:
📐 Master Formulas (1.5 lb vs. 2.0 lb Bucket):
Standard 1.5 lb Loaf (64% Hydration):
- Bread Flour: 400g (100%)
- Cold Water (62°F): 236g (59%)
- Active Sourdough Starter: 80g (20% — contains 40g flour + 40g water)
- Fine Sea Salt: 8g (2.0%)
- Olive Oil / Butter (soft crumb): 12g (3.0%)
- Total Flour: 440g | Total Water: 276g | Net Hydration: 62.7%
Large 2.0 lb Loaf (65% Hydration):
- Bread Flour: 500g (100%)
- Cold Water (62°F): 300g (60%)
- Active Sourdough Starter: 100g (20% — contains 50g flour + 50g water)
- Fine Sea Salt: 10g (2.0%)
- Olive Oil / Honey (optional): 15g (3.0%)
- Total Flour: 550g | Total Water: 350g | Net Hydration: 63.6%
*Need to adjust pan capacities? Use our precision recipe scaler to recalibrate gram measurements for any bucket dimensions.
Navigating Cycles: Automated vs. The Hybrid Two-Stage Method
Commercial instant yeast is bred to explode with carbon dioxide in 45 minutes; wild sourdough yeast requires 3 to 5 hours of steady bulk fermentation. If you press "Start" on a standard White Bread cycle, the machine will start baking while your sourdough is still a flat, dense lump. Here are your two operational strategies:
Method A: The Custom Programmable Cycle (Hands-Off)
If your machine has customizable cycle times (like a Zojirushi Home Bakery Virtuoso or Breville Custom Loaf), program the following timeline:
- Rest / Autolyse: 20 minutes
- Knead: 18 minutes (paddle forms smooth gluten ball)
- Rise 1: 2 hours at 78°F (26°C)
- Rise 2 / Shape: 1 hour 30 minutes
- Bake: 55 minutes on "Dark Crust" setting (205°F / 96°C target internal temperature)
Method B: The Universal Hybrid Two-Stage Method (Any Machine)
If your machine has fixed pre-sets, this universal two-stage method works on literally every bread maker manufactured since 1990:
- Stage 1 - The Dough Cycle: Add chilled liquids, starter, flour, and salt. Select your machine's "Dough" cycle (which kneads for 15-20 minutes, then rests). Allow the cycle to complete its knead.
- Remove Paddle (The Secret Trick): Once the kneading stops and the machine rests, grease your hands with water or oil, reach into the bucket, lift the dough ball, slip the paddle off the center post, and gently place the smooth dough ball back down. No bottom hole!
- The Extended Natural Rise: Turn the machine OFF. Leave the lid closed. Let the dough proof naturally in the insulated machine chamber for 3 to 4.5 hours. Check through the viewing window until the dough reaches approximately 1 inch below the top rim of the bucket.
- Stage 2 - The Bake Cycle: Once fully risen, select the "Bake Only" cycle. Set timer to 50 to 55 minutes. Close lid and press start.
- Check Internal Temp & Cool: At the 50-minute mark, probe center with an instant-read digital thermometer. Bread is done when it reads between 205°F and 208°F (96°C–98°C). Immediately remove pan and invert onto a cooling rack. Wait at least 1 hour before slicing!
Troubleshooting Bread Machine Sourdough
| Symptom | Root Cause | Corrective Fix |
|---|---|---|
| Sunken / Collapsed Top Crater | Overproofed; dough rose to top, exhausted yeast food supply, and deflated during initial heating. | Cut bulk fermentation time by 45 minutes; ensure water temperature is below 65°F (18°C). |
| Dense, Brick-Like Texture | Underproofed; wild yeast did not have enough time to expand before baking cycle started. | Increase bulk rise time until dough reaches 1 inch below bucket rim. Refer to our overproofed vs underproofed visual guide. |
| Pale, Soft Crust | Lack of residual sugars; wild yeast consumed all carbohydrates during long fermentation. | Add 12g (1 tbsp) of honey or cane sugar to the formula, or increase bake cycle time by 5 minutes. |
| Torn, Ragged Mushroom Cap | Under-hydrated or insufficient gluten elasticity; dough burst irregularly along edges. | Increase water by 10g-15g or switch to unbleached flour with 12.7%+ protein content. |
Frequently Asked Questions (People Also Ask)
Can I use sourdough discard in a bread machine?
Yes, but because unfed sourdough discard lacks active leavening power, you must supplement it with 1 teaspoon of commercial active dry or instant yeast added on top of the flour. Discard provides incredible artisan tang and moisture retention, while commercial yeast ensures a predictable 90-minute rise on standard cycles. If you have excess discard, you can also bake our popular sourdough discard English muffins or sourdough discard bagels.
Why did my bread machine sourdough collapse in the center?
A collapsed top crust is almost always the result of overproofing or excessive hydration. When dough rises past its maximum structural peak, the gluten matrix weakens and can no longer support its own weight. When the heating element kicks on, the trapped carbon dioxide expands rapidly, tearing the overstretched gluten walls and causing the dome to cave inward.
Should I add fat or oil to bread machine sourdough?
Adding 2% to 3% fat (extra virgin olive oil or softened unsalted butter) is highly recommended for bread maker sourdough. Fat lubricates the gluten strands, helping the dough slide smoothly off non-stick paddles, softens the sandwich crumb for easier slicing, and significantly extends counter shelf life. Review our sourdough storage and shelf life guide for complete preservation tactics.
How do I get a crispy artisan crust in a bread maker?
Bread makers vent moisture during baking, which dries the crust prematurely before starch gelatinization can occur. To achieve a blistered, crisp crust, select the "Dark Crust" setting, lightly mist the top of the dough with water from a spray bottle immediately before starting the Bake cycle, and remove the loaf from the aluminum bucket immediately upon cycle completion to prevent trapped steam from softening the sides.
Explore More Artisan Sourdough Architecture:
Whether you bake in automated machines or cast iron Dutch ovens, mastering baker's percentages is the secret to repeatable, bakery-quality bread.
- Visit the master Artisan Sourdough Pillar Guide for complete fermentation science.
- Dial in custom flour and levain ratios with the Interactive Sourdough Calculator.
- Explore fast weekday baking with our Same-Day Sourdough Protocol.